Do you want to install a new module on your Prestashop store but would like to test it before making it available to your customers? Here is the method to use.
Foreword: preprod, sandbox, draft, et caetera
Before you start reading what follows, know that the best method to test a Prestashop module is not the one described below.
The best method is to have a test environment.
Terms vary; we often talk about “preprod”, “sandbox”, “draft”, etc; but all these titles basically describe the same thing: a test environment. In other words, a copy of your Prestashop store, hosted on another domain or subdomain (eg: https://test.maboutique.com), with the same source files and the same configuration than your “real” shop.
This environment is useful for you, as a merchant or manager of a shop, to do everything that you cannot do on the production environment: test, tinker, check,… You can afford to crash your environment test, not the production one!
Setting up a test environment takes some time and skill. If you haven’t (ecnore) taken the time to do so, you can fall back on the solution explained in this tutorial.
Create a customer group dedicated to testing
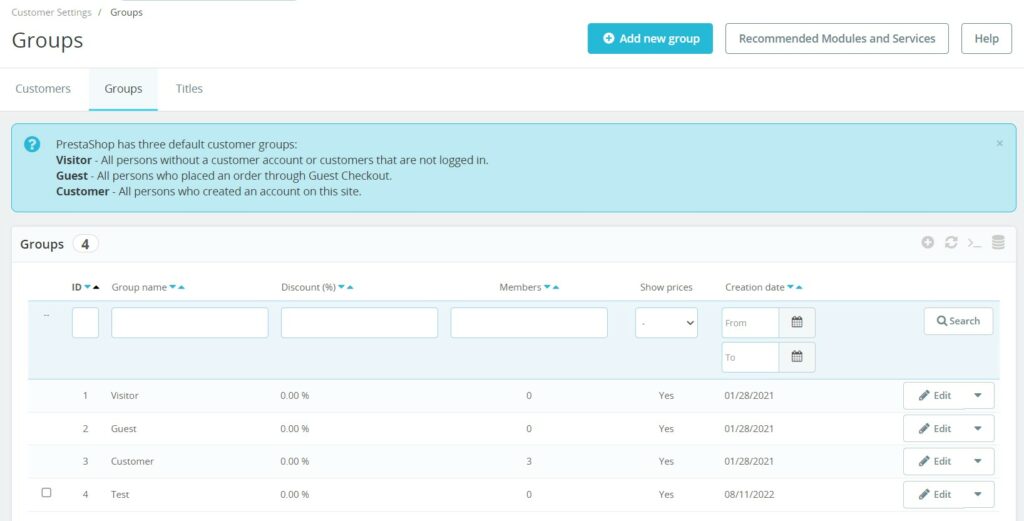
Prestashop allows you to manage “customer groups”. Natively it offers 3: “Visitor”, “Guest” and “Client”. But you can add as many new groups as you want.
To do this, you must go to the “Shop parameters” menu, then “Customers”. Then go to the “Groups” tab and click on “Add a new group”.
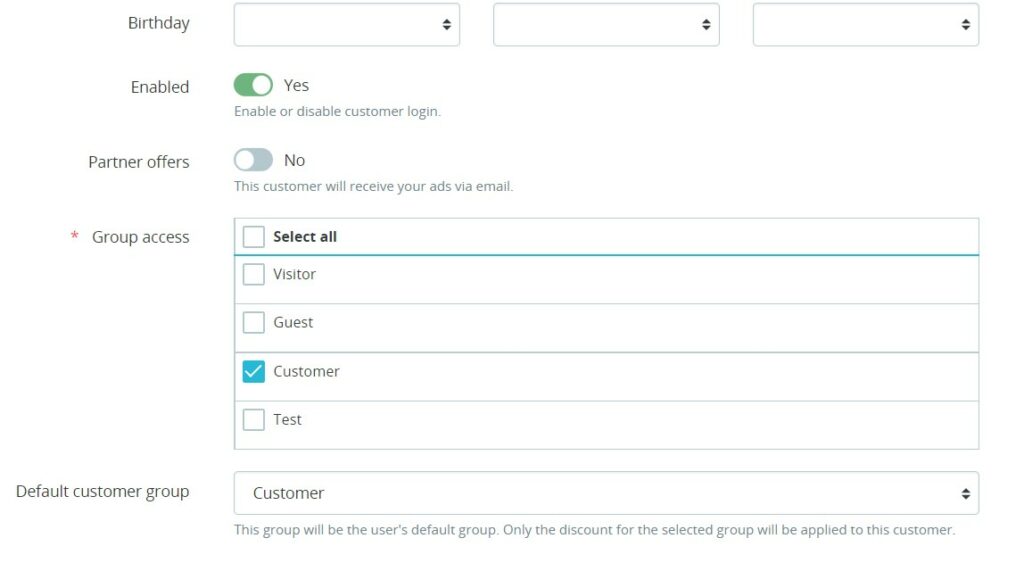
Remember to associate your test customer account with this new group (from the “Customers” menu).
Limit module access or display to test group
To restrict access or display of the module to the new test group, until you validate its proper functioning, there is one general method and 2 alternative methods (for the payment and transport modules).
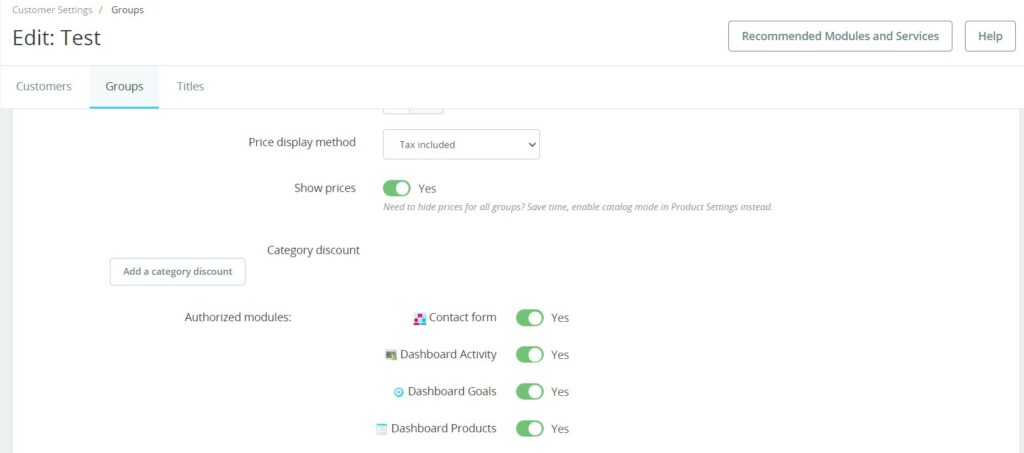
The general method is to “unauthorize” the module for all customer groups except for the “Test” group.
From the list of customer groups, click on the “Modify” button to access the group configuration form (here the “Visitor” group). Go down a bit on the page, identify the module to be tested in the “Authorized modules” list and switch the switch to “No”. Don’t forget to save.
Repeat the operation for all the client groups (except the “Test” group of course).
Test a payment module for Prestashop
If you want to test a payment module there is an alternative (and faster) method.
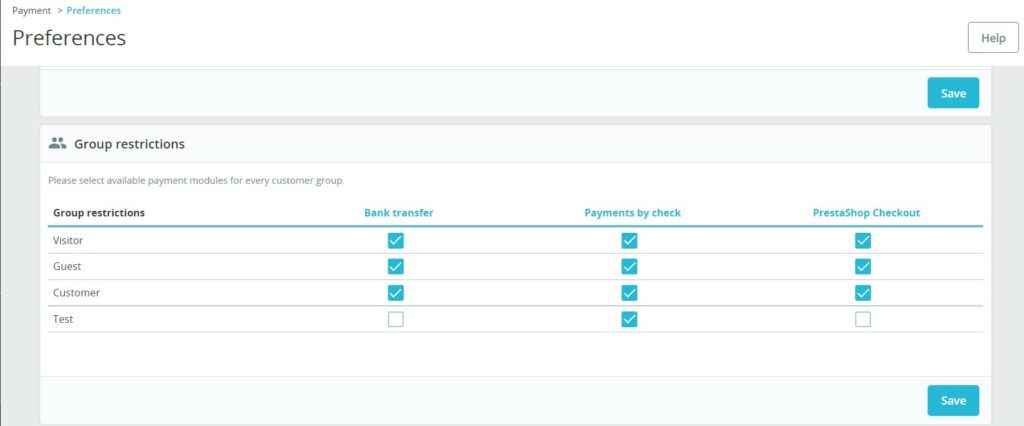
Access the “Payment > Preferences” menu. On this page you will find all the restrictions of the payment modules (it is for example in this menu that you can restrict the access of a payment module to the people of one or more countries).
You will find a “Group Restrictions” block. So that the payment method is only displayed for members of the “Test” group, you just have to uncheck the boxes for the other groups.
Test a shipping module for Prestashop
To test a transport module, the method is quite the same.
Here it is not the delivery module itself that is restricted to a group but rather a carrier.
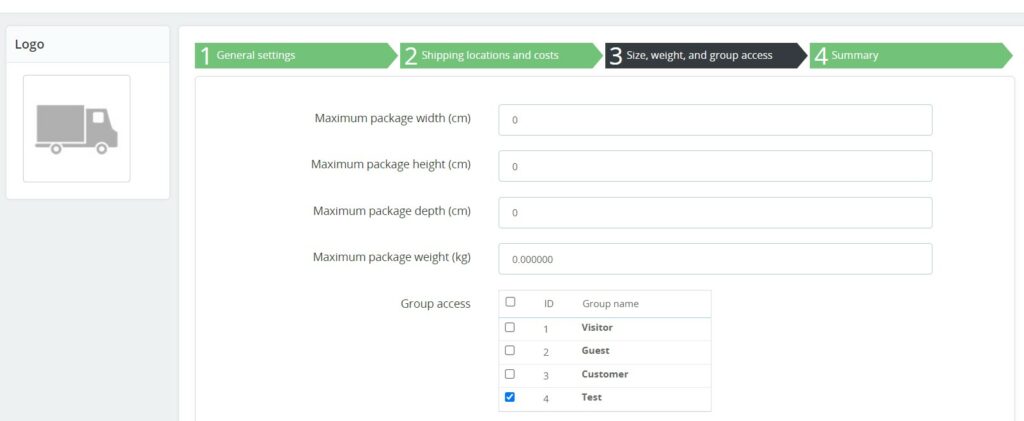
Go to the “Shipping > Carriers” menu and identify the delivery method you want to reserve for the “Test” group. From the list, click on the corresponding “Modify” button.
On step 3 (“Siez, weight and group access”), select the “Test” group only then click “Finish” to save the changes.
End of tests: make the module accessible to all customers
All tests passed and greeen-lighted ?
Now is the time to make the module available to all customers.
Remove the restrictions you put in place earlier and you’re done.
Credits : Pressfoto